Jitsi: a module to extend your Moodle e-learning platform
Remote learning must be accessible to everyone, from anywhere in the world, at all times. It doesn’t matter where your students are. Moodle The open source E-learning platform allows you to create a private online learning space with lots of engaging educational activities and resources.
Coupled with Moodle, Jiti installs to complete and add additional functionality to your E-learning platform.
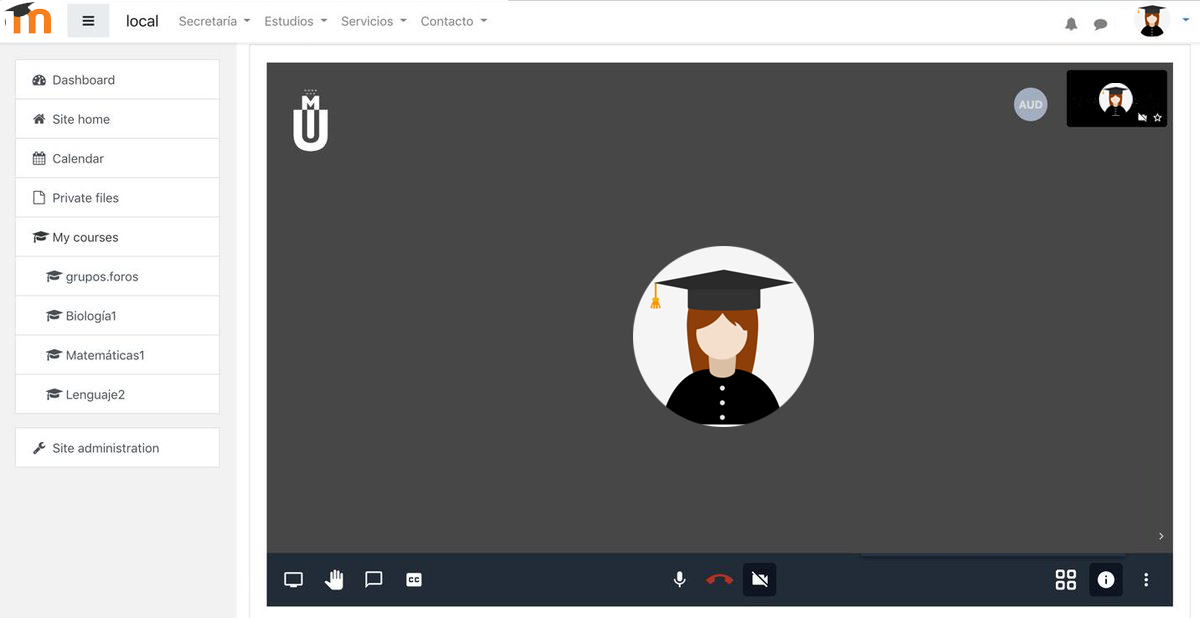
CREATE JITSI-MEET VIDEOCONFERENCING SESSIONS
This module allows you to create jitsi-meet videoconferencing sessions fully integrated into Moodle. These videoconferences will use your Moodle username by displaying your username and your avatar in the videoconferences.
Jitsi-meet is an open source videoconferencing solution that allows you to easily create and implement secure videoconferencing solutions.
Whether you use the public server provided by Jitsi or you use your own videoconferencing server, with this plugin, you can create videoconferencing sessions in your Moodle courses in a simple way: you just need to configure the domain of the Jitsi server, then, in the course, create a new Jitsi activity.

The module also allows you to use tokens to grant moderation permissions to the roles you want using the mod / jitsi: moderation capability. (For this option, it is necessary to have your own Jitsi server with a token configuration).
Plan your videoconferences on time and make them accessible with the minutes you want. In addition, the session will be displayed in the Moodle calendar.
Jitsi allows video conference recording, direct transmission to YouTube, screen sharing, full screen display, statistics display, among other features and all these options are fully compatible with this module.
SOME MODULE CONFIGURATION OPTIONS
- jitsi-domain : define the jitsi server address to use here. By default, you can use the public server meet.jit.si but you can use your own Jitsi server
- jitsi-help : enter the text you want to display for all users here when they enter a jitsi resource.
- jitsi-id : choose how you want to identify users in video conferences. The options are user name or first name and last name.
- jitsi-sessionname : you can configure how to name the video conference rooms. You can use the short course name, jitsi resource ID, and session name. You can choose any combination of these three parameters.
- jitsi-separator : choose a character with which to separate the jitsi-sessionname parameters.
- jitsi-channellastcam : with this setting you can set the maximum number of cameras that users can see. If you set it to -1, there will be no limit but if for example you set it to 2, only the 2 cameras of the last two users who have been active in the videoconference will be displayed.
- jitsi-showinfo : whether or not to display videoconference information
- jitsi-blurbutton : display or not the option to blur the background of the image
- jitsi-shareyoutube : display or not the option to share a YouTube video in the video conference.
- jitsi-livebuttom : display or not the option to broadcast the video conference via YouTube.
OXABOX recommends Jitsi because we confirm that the software integrates into the Moodle ecosystem and we can guarantee that the purchasing, installation and overall functionality process is the best possible.


